Intercoat Delamination
Why coats separate from each other, how recoat windows, blush and contamination cause intercoat failure, and how to diagnose, repair and prevent it.
Key takeaways
- Intercoat delamination is loss of adhesion between two coats of a system, while the lower coat stays bonded to the substrate.
- The most frequent causes are exceeding the maximum recoat window, contamination between coats (including amine blush) and incompatible products.
- Examining both faces of the split, plus application records, usually identifies the cause.
- Repairs must restore a bondable surface by abrading, cleaning and, where needed, using a tie coat; simply recoating over the failure repeats it.
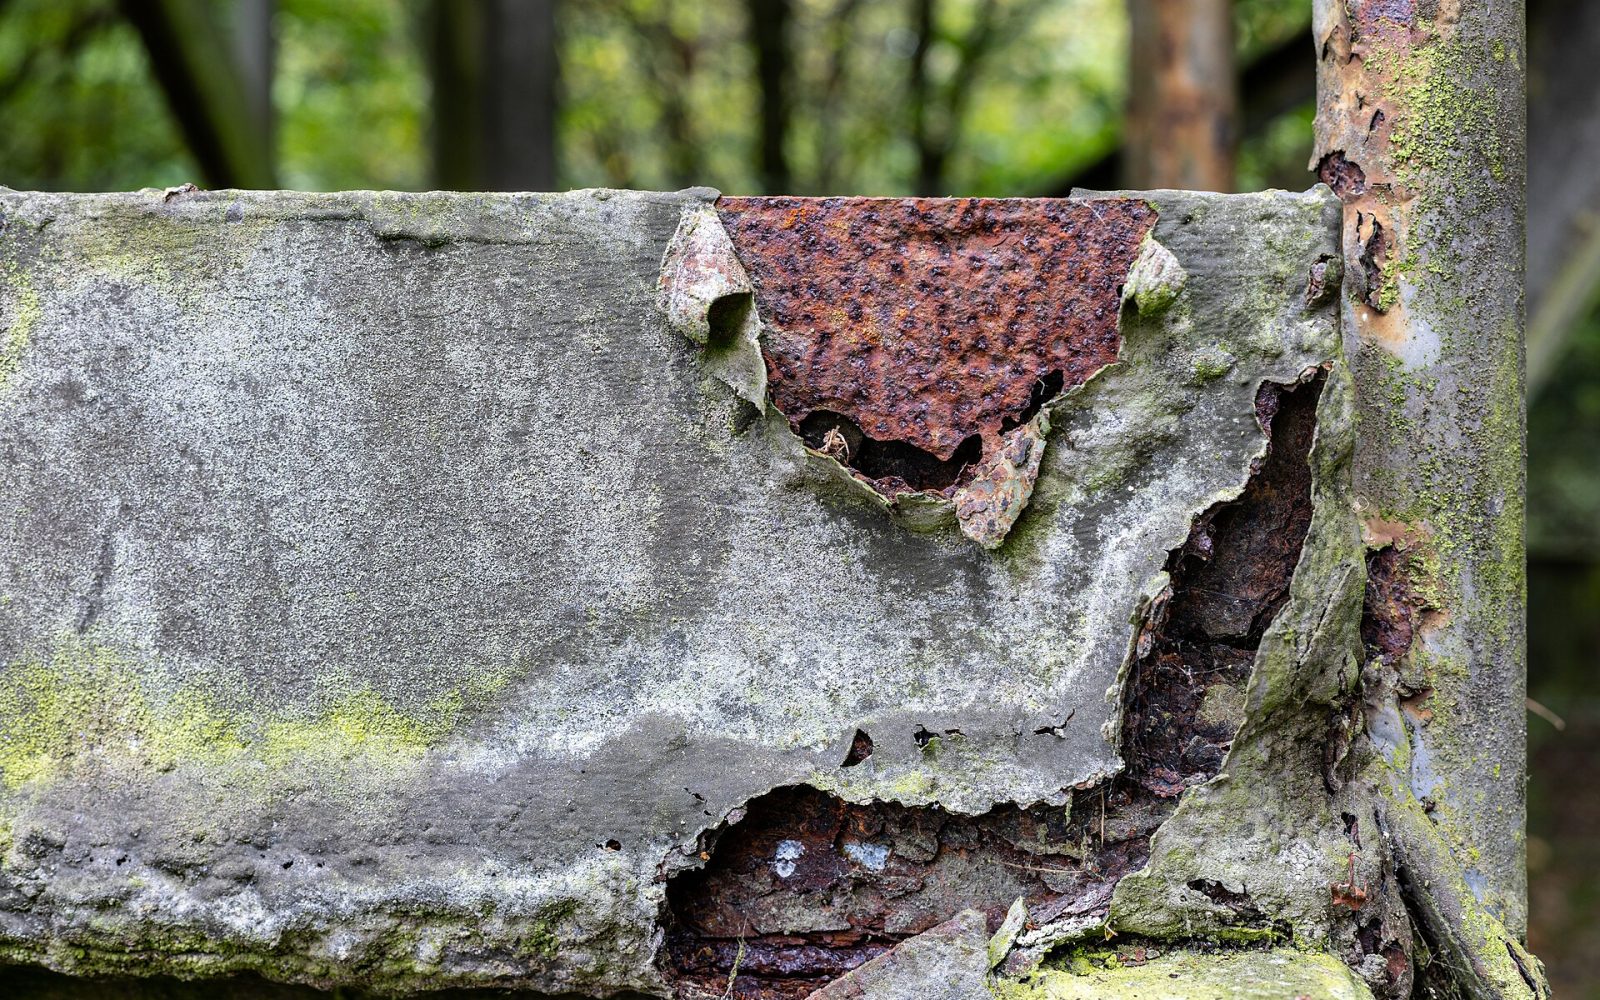
Multicoat systems depend on each layer bonding to the one below. When that bond fails, the upper coats peel, flake or lift in sheets, often exposing a lower coat that looks perfectly sound. Because the substrate remains protected for a time, intercoat delamination is sometimes dismissed as cosmetic, but it reduces total film thickness, exposes primers not designed for weathering, and frequently spreads.
This article focuses on failures between coats. For adhesion loss at the substrate, see delamination and adhesion failure.
What intercoat delamination looks like
- Topcoat peeling in sheets or flakes, with a clean, often glossy lower coat underneath.
- The back of the detached flake is smooth and shows little or no lower-coat material.
- Failure that starts at edges, damage or welds and progresses outward.
- Sometimes, intercoat blisters that break to reveal an intact primer.
- Failure appearing soon after application, or after thermal cycling, impact or water exposure.
Causes
Exceeding the recoat window
Many coatings, particularly epoxies and some polyurethanes, cure to a hard, dense, chemically resistant surface. Once the maximum recoat interval passes, the next coat can no longer bond chemically or penetrate, and mechanical adhesion to a smooth surface is weak. High temperatures and UV exposure shorten the window. Epoxy surfaces exposed to sunlight also chalk, leaving a weak layer. See recoat windows and intercoat adhesion.
Contamination between coats
- Amine blush on amine-cured epoxies, formed in cool, humid conditions.
- Dust, dirt, abrasive and dry spray left on the surface.
- Oil, grease, silicone and handling residues.
- Soluble salts deposited in marine or industrial environments while the lower coat sat exposed.
- Moisture or condensation on the lower coat at the time of overcoating.
Incompatibility and other causes
- Generic incompatibility, such as a strong-solvent topcoat lifting a weak, solvent-sensitive primer, or a rigid topcoat over a soft, flexible base.
- Undercured or solvent-rich lower coats; see solvent entrapment.
- Inadequate abrasion of aged or glossy coatings when overcoating.
- Mixing errors leaving a lower coat with an incorrect surface.
Diagnosis
Begin by confirming where the failure plane is. Remove a sample, examine both the detached coat’s underside and the exposed surface, and measure layer thicknesses.
| Cause | Clues | Check | Prevention |
|---|---|---|---|
| Recoat window exceeded | Clean, glossy lower coat; smooth flake back | Daily reports: dates and temperatures between coats | Schedule within window; abrade if exceeded |
| Amine blush | Waxy or greasy lower surface, cool humid conditions | Water wipe or pH test of lower coat surface | Wash blush off; control humidity |
| Dirt or dry spray | Particles on flake back or lower coat | Magnified examination; tape test | Clean and inspect before each coat |
| Chalking / UV degradation | Powder on lower coat, exterior exposure | Chalk test by finger or tape | Limit UV exposure; remove chalk before recoat |
| Incompatibility | Lifting, wrinkling or softening of lower coat | Product identities; solvent sensitivity test | Use the manufacturer’s tested system |
| Salt contamination | Intercoat blisters in marine exposure | Salt test on lower coat | Wash before recoating exposed coats |
Adhesion testing
Pull-off tests per ASTM D4541 report the location of failure as adhesive (between layers) or cohesive (within a layer). Knife tests (ASTM D6677) and cross-cut or X-cut tests (ASTM D3359) show where coats separate in thinner systems. Recording failure location is as important as the value. See adhesion testing.
Look at the back of a delaminated flake under magnification. Fine dust, a waxy film or a perfectly mirrored image of the lower coat each tell a different story, and the evidence is lost once the area is cleaned.
Repair
- Define the extent. Test adhesion across the structure, not just at visible failures, to find marginal areas.
- Remove unsound coating. Scrape, power-tool clean or sweep blast until remaining coats pass the specified adhesion test.
- Feather edges. Taper the edges of sound coating so the new coat does not lift them.
- Prepare the lower coat. Abrade or sweep blast to create a profile, then remove dust and contaminants; wash off blush or salts.
- Use a tie coat if required. Some manufacturers specify a tie coat or recoatable primer when a window has been exceeded.
- Test a patch. Apply a trial area, allow cure and test adhesion before full-scale repair.
An adhesion test on new repair coats over aged epoxy can look acceptable at first and fail after thermal cycling. Allow full cure before testing, and test repairs in the harshest exposure areas.
Prevention
- Schedule each coat within its recoat window at the actual surface temperature.
- Inspect and clean each coat before overcoating, including tests for blush and salts where relevant.
- Use systems designed and tested together, ideally from one manufacturer.
- Abrade cured, glossy or aged surfaces when windows are exceeded, as the data sheet directs.
- Record intervals, conditions and cleaning in daily reports.
Frequently asked questions
Can a topcoat adhere to an epoxy past its recoat window?
Often yes, if the epoxy is abraded and cleaned, or if a manufacturer-approved tie coat is used. Follow the product data sheet.
Is intercoat delamination covered by warranty?
It depends on the terms and cause. Application errors are typically the contractor’s responsibility; product defects are the manufacturer’s.
How is it different from cohesive failure?
Intercoat failure occurs at the interface between coats; cohesive failure occurs within a single coat.
Educational reference. Coating performance varies by formulation. Always follow the manufacturer’s product data sheet, safety data sheet and your project specification.