Shot Blasting Concrete
Shot blasting fires recycled steel shot at concrete to strip laitance and old films and leave a clean, open profile ready for coatings and overlays.
Key takeaways
- Shot blasting propels steel shot at the slab with a spinning wheel, then vacuums the shot, separates it from dust and debris, and throws it again in a closed loop.
- It removes laitance, curing compounds, weak paste and many thin coatings while producing a roughly CSP 2–7 profile, depending on shot size, machine speed and passes.
- It is fast and dry on large, open floors but cannot reach edges, corners or tight areas, which need grinders or hand tools.
- Match the profile to the coating thickness on the product data sheet. Thin films need light profiles; thick mortars and overlays can use aggressive ones.
Shot blasting (sometimes called captive or recycling shot blasting) is the workhorse method for preparing large concrete floors and decks before coating. A self-contained machine throws steel shot at the surface, fractures off the weak top layer and contaminants, and recovers the abrasive so it can be reused hundreds of times. The result is a clean, roughened, open-pored surface with the texture needed for mechanical bonding.
This article covers how the process works and how to run it well. For the broader picture of choosing between methods and reading the CSP scale, see concrete surface preparation and CSP.
How shot blasting works
A shot blaster is built around a blast wheel: a high-speed impeller that receives a metered stream of shot and flings it downward through a blast housing onto the floor. Brushes or seals around the housing keep the shot inside. The rebounding mixture of shot, concrete fines and coating chips is pulled up by airflow into a separator, where heavier shot drops back into the hopper and dust travels on to a cartridge or bag dust collector.
Because the abrasive is captured and recycled, the process is essentially dust-free at the blast head when the collector is sized and maintained correctly. Machines range from walk-behind units with a blast path of roughly 8–10 in (200–250 mm) to ride-on machines several feet wide.
Three variables control how aggressive the cut is:
- Shot size – larger shot carries more energy per particle and cuts deeper but leaves a coarser, more widely spaced pattern.
- Travel speed – slower forward speed means more impacts per area and a deeper profile.
- Abrasive flow – set by the control valve and monitored with an amp meter on the wheel motor; more flow means more work, up to the machine’s limit.
Profile, shot size and settings
ICRI 310.2R associates shotblasting with a wide span of the concrete surface profile (CSP) scale, from a light CSP 2–3 texture to heavy profiles around CSP 7 or more with coarse shot and slow passes. The right target comes from the coating, not the machine. As a general guide:
| Coating system | Typical thickness | Common CSP target | Typical shot approach |
|---|---|---|---|
| Sealers, thin-film epoxy or urethane | 3–10 mils (75–250 µm) | CSP 1–3 | Fine shot, fast travel (or grinding instead) |
| High-build epoxy, broadcast systems | 10–40 mils (250 µm–1 mm) | CSP 3–5 | Medium shot, moderate speed |
| Self-levelling and slurry systems | 40–125 mils (1–3 mm) | CSP 4–6 | Medium to coarse shot |
| Polymer overlays, mortars, urethane cement | ⅛–¼ in (3–6 mm) and up | CSP 5–7+ | Coarse shot, slow travel or two passes |
These are typical ranges only. Always confirm the required CSP and any minimum tensile strength on the manufacturer’s product data sheet and the project specification.
Blast a test area at two or three settings before production, then compare the result against ICRI CSP replica chips under raking light. Lock in the shot size, flow and speed that hit the target, and record them so every operator reproduces the same profile.
Running the job
- Assess the slab. Check concrete age and cure, look for oil, sealers, curing compounds and soft areas, and run moisture tests as specified (see concrete moisture testing).
- Pre-clean. Scrape off heavy deposits and degrease oil-soaked areas; shot blasting fractures contaminated paste but can smear oils and drive them into pores.
- Set up and test. Load the chosen shot, check seals and brushes, verify dust-collector filters and run a test patch.
- Blast in straight, overlapping lanes. Keep a steady speed, overlap each lane slightly and avoid stopping with the wheel engaged, which digs a hole.
- Prepare edges. Finish perimeters, corners, around columns and drains with dust-shrouded grinders or scabblers so they match the field profile.
- Clean up. Magnet-sweep stray shot, then vacuum thoroughly. Loose shot left on the floor will rust and stain or telegraph through thin coatings.
- Inspect. Compare to CSP chips, check for remaining laitance or coating and, where specified, verify surface strength.
Advantages and limitations
Advantages
- Very high production rates on open floors and decks.
- Dry process: no water, slurry or rinse cycle, so coating can often follow the same day once the floor is clean.
- Removes laitance, curing compounds and many thin coatings in one step.
- Exposes hidden defects such as weak paste, delaminations and voids before coating, not after.
- Abrasive recycling keeps waste volume low.
Limitations
- Cannot reach edges, corners, stair treads or tight spaces.
- Can leave visible lane lines (“tracking” or striping) that telegraph through thin, glossy coatings.
- Struggles with thick elastic coatings, mastics and soft adhesives, which tend to absorb impact rather than fracture.
- Opens up bug holes and exposes aggregate, which may add patching or a scratch coat to the scope.
- Generally too aggressive for thin decorative films unless set very lightly.
For thick elastomers and adhesives, diamond grinding with PCD tooling is often used first.
Quality checks and common problems
Inspection of a shot-blasted floor focuses on uniformity, soundness and cleanliness:
- Profile. Compare representative areas, including edges, with CSP chips. Profile should be uniform without gouges or untouched patches.
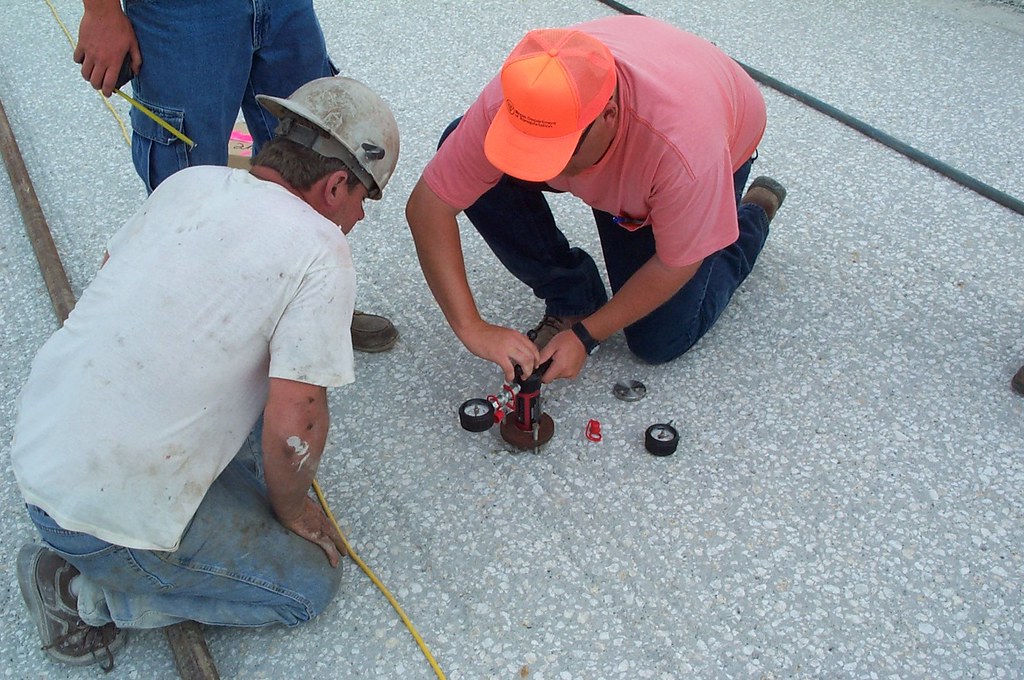
- Soundness. Where the specification calls for it, run pull-off tests on the prepared surface (ASTM D7234; see concrete pull-off testing). Many floor systems look for roughly 200–250 psi (1.4–1.7 MPa) or more with failure in the concrete, but follow the specification.
- Cleanliness. No residual laitance, sealer, oil or loose dust. A simple water-drop test helps: water should darken and absorb into prepared concrete rather than bead.
- Stray shot. Check joints, cracks and wall bases where pellets collect.
Shot blasting does not clean out oil that has soaked deep into the slab. Contaminated concrete can look clean after blasting and still cause fisheyes or delamination later. Test suspect areas and remove or treat contamination before coating.
Lane lines usually trace to uneven overlap or speed, shallow spots to worn wheel parts or low flow, and gouges to stopping with the wheel engaged.
Safety and dust control
Concrete contains crystalline silica, and the fines collected during blasting are respirable. In the United States, construction work is covered by OSHA 29 CFR 1926.1153; follow your employer’s exposure control plan and use the dust collection the equipment was designed for (see crystalline silica and abrasive blasting). Other hazards include ricocheting shot if seals are worn or the machine is tilted, noise, electrical cords and lifting heavy machines. Never lift the blast head with the wheel running.
Frequently asked questions
Is shot blasting better than diamond grinding?
Neither is universally better. Shot blasting is faster on large areas and gives a deeper, more open profile for thicker systems. Grinding gives a flatter, smoother result, reaches closer to edges and suits thin films and very hard or uneven slabs.
Can I coat the same day after shot blasting?
Often yes, because the process is dry. The floor must still be fully vacuumed, inspected, repaired where needed and within the moisture limits in the product data sheet.
Will shot blasting remove old epoxy?
Thin, brittle coatings usually come off well. Thick, flexible or well-bonded systems may need slow passes, coarse shot or a different method such as grinding with PCD tooling.
Why are there stripes in my finished floor?
Stripes usually come from uneven profile between blast lanes. Thin, glossy coatings telegraph this texture. Better lane overlap, consistent speed or a light grind or primer/scratch coat can prevent it.
Educational reference. Coating performance varies by formulation. Always follow the manufacturer’s product data sheet, safety data sheet and your project specification.