Garage Floor Coatings
What residential and light-commercial garage floors demand from a coating, how epoxy, polyaspartic and flake systems compare, and why preparation decides the outcome.
Key takeaways
- Garage floors combine hot tires, road salt, automotive fluids, freeze–thaw slush and UV from an open door, all on a slab that may have no vapor retarder beneath it.
- Thin waterborne epoxy “paint” kits are the most failure-prone option. High-solids epoxy, polyaspartic and flake broadcast systems last far longer when properly installed.
- Mechanical preparation, usually diamond grinding to roughly CSP 2–3, is far more reliable than acid etching for garage slabs.
- Test slab moisture before coating. Vapor drive from below is a leading cause of blisters and peeling.
- Hot tire pickup is mostly a bond and thickness problem, and it is best prevented with good preparation and an adequate film build.
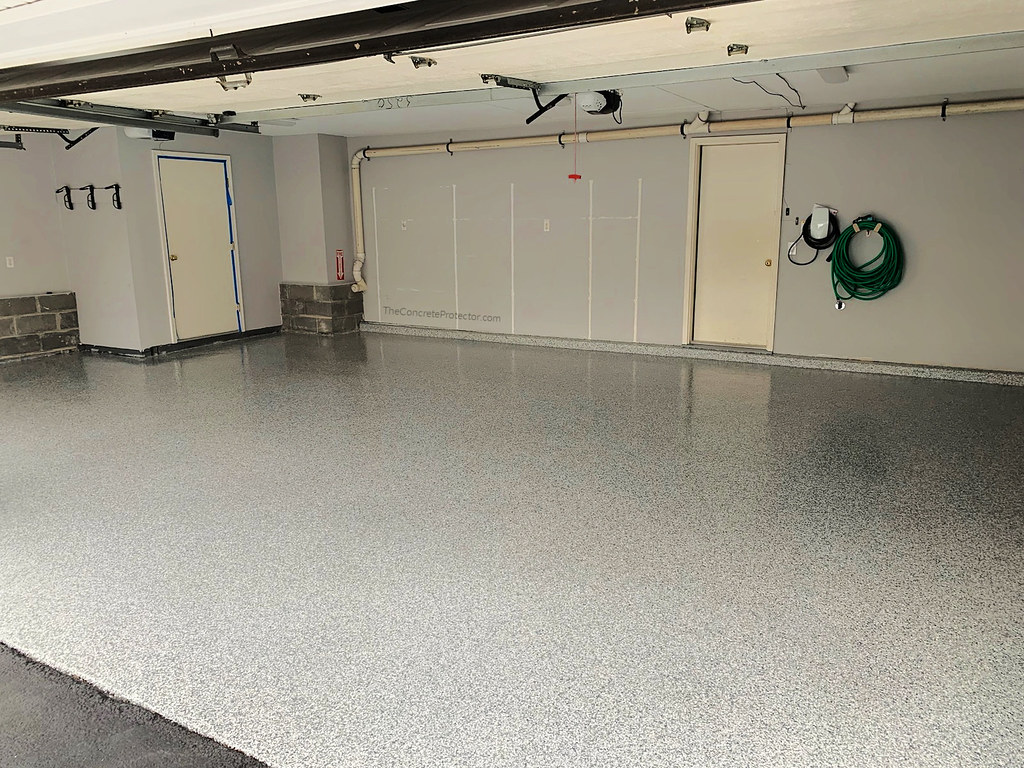
Garage floor coatings are resinous systems applied to residential garages, workshops, showrooms and light-commercial vehicle bays. They seal dusty concrete, resist stains and fluids, make the floor easier to clean and improve its appearance. Although they are a subset of concrete floor coatings in general, garages have a distinctive mix of stresses that makes product choice and preparation especially important.
What makes garage floors different
- Hot tire pickup. Tires heated by driving soften the coating beneath them. As the tire cools it grips the film, and when the car moves the tire can pull a poorly bonded or thin coating off the slab. Plasticizers that migrate from tire rubber can also stain or soften some films.
- Chemicals. De-icing salts, gasoline, motor oil, brake fluid, antifreeze and battery acid all end up on the floor.
- Moisture and temperature swings. Many garage slabs sit on grade without a vapor retarder, and meltwater and slush pool on them in winter.
- UV exposure. Sunlight through an open door yellows aromatic epoxies near the entrance.
- Abrasion and impact. Dropped tools, jack stands, studded tires and grit tracked in from the driveway.
Garage floor coating systems compared
| System | Typical build | Strengths | Watch-outs |
|---|---|---|---|
| Waterborne epoxy kit | About 3–6 mils (75–150 µm) | Low cost, low odor, DIY-friendly | Thin film; prone to hot tire pickup and peeling |
| High-solids or 100% solids epoxy | About 8–20 mils (200–500 µm) per coat | Strong bond, good film build, chemical resistance | Yellows in UV; slow cure in cold; amine blush in humid conditions |
| Polyaspartic or aliphatic polyurea | About 5–15 mils (125–375 µm) per coat | Fast return to service, UV stable, wide temperature window | Short pot life; demands experienced installers |
| Flake (chip) broadcast system | About 20–40 mils (500–1,000 µm) total | Texture, hides slab blemishes, very durable | More steps and cost; clear topcoat governs wear |
| Single-component acrylic paint or sealer | Thin | Inexpensive dust-proofing | Low resistance to hot tires and solvents |
Figures are typical ranges only; follow the product data sheet for each layer. Many professional systems combine an epoxy primer or body coat with a polyaspartic or polyurethane topcoat to get both strong penetration and UV-stable wear. Full-flake systems are a form of broadcast flooring, where colored vinyl chips are seeded into the wet basecoat, the excess is scraped off after cure and a clear coat locks the surface in.
Surface preparation
Most garage coating failures start before the first coat goes down. The slab must be sound, clean and open-pored, with a profile suited to the system. See concrete surface preparation for the full background.
Grinding versus acid etching
Acid etching is still sold with many DIY kits, but it often leaves an uneven surface, residual laitance and salts, and adds moisture to the slab. Diamond grinding with dust extraction removes laitance, sealers and contamination and produces a consistent profile. Thin films usually need about CSP 2–3 under ICRI 310.2R; heavier systems may need more. Shot blasting is an alternative for larger floors.
Contamination and repairs
- Degrease oil-stained areas, then grind. Deeply soaked spots may need repeated cleaning or local removal.
- Remove existing sealers and curing compounds. A drop of water that beads instead of darkening the concrete suggests a sealer is still present.
- Fill cracks, spalls and pop-outs with a compatible repair material. Honor control joints, or fill them only where the system allows.
Slab moisture and timing
Moisture vapor moving up through the slab can build pressure under an impermeable film and cause blisters or debonding. The usual tests are in-situ relative humidity probes (ASTM F2170) and the calcium chloride emission test (ASTM F1869); the plastic-sheet method (ASTM D4263) is a quick qualitative screen. Compare results with the primer manufacturer’s limits, and use a moisture-mitigating primer where readings are high. See concrete moisture testing.
New slabs are commonly left for at least 28 days, but strength gain and drying are separate processes, so test rather than assume a slab is dry. Slab temperature also matters: cold slabs slow the cure of epoxies and raise the risk of condensation and blush.
An attached garage is often colder and damper than the house. Check the slab surface temperature and the dew point, not just the air temperature, before coating.
Typical installation sequence
- Assess. Test moisture, look for old sealers and map cracks, joints and oil stains.
- Prepare. Degrease, grind with vacuum extraction, repair defects and vacuum thoroughly.
- Prime. Apply a penetrating primer or the first epoxy coat at the specified spread rate.
- Build. Apply the body coat. For flake systems, broadcast chips to refusal while the coat is wet.
- Scrape and clean. After cure, scrape off loose chips and vacuum.
- Topcoat. Apply a clear or pigmented wear coat, adding fine aggregate if slip resistance is needed.
- Cure. Respect the foot-traffic and vehicle-traffic times on the data sheet. Vehicles usually need longer than people.
Slip resistance and finish
High-gloss coatings look striking but can be slippery when wet or oily, which is a real hazard on a garage apron or near a door. Fine aggregate in the topcoat, a textured flake surface or a satin finish improves traction. The trade-off is that rougher surfaces are harder to mop. Test a sample board of the chosen texture before committing to the whole floor.
Common failures
- Hot tire pickup — thin films, poor preparation, or driving on the floor before full cure.
- Peeling at the door — moisture, salts and freeze–thaw at the slab edge, often where preparation was weakest.
- Blisters — moisture vapor drive or outgassing from the porous concrete.
- Cloudy or greasy surface — amine blush on epoxy cured in cold, humid conditions.
- Yellowing — UV exposure of aromatic epoxy without a UV-stable topcoat.
For diagnosis, see floor coating failures.
Frequently asked questions
Why did my garage coating peel under my tires?
Usually because the film was thin or poorly bonded. Hot tires soften the coating, then grip and lift it as they cool. Good mechanical preparation, an adequate film build and full cure before driving on it are the main defenses.
Is polyaspartic better than epoxy for a garage?
Each has strengths. Polyaspartics cure quickly and resist UV; epoxies penetrate and build thickness economically. Many installers use an epoxy base with a polyaspartic topcoat.
Do I really need to grind the floor?
For durable results, mechanical preparation is strongly preferred. Etching can work on some clean, unsealed slabs, but it is less consistent and does not remove sealers or deep contamination.
How soon can I park on a new garage coating?
It depends on the system and the temperature. Fast-cure polyaspartics may allow vehicles within about a day, while epoxies often need several days. Follow the vehicle-traffic time on the data sheet.
Educational reference. Coating performance varies by formulation. Always follow the manufacturer’s product data sheet, safety data sheet and your project specification.